


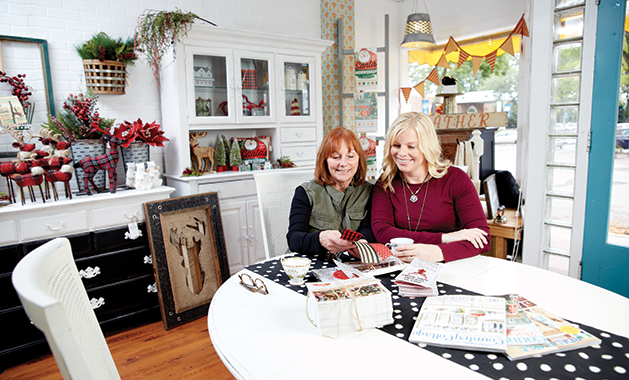
For Danielle Rode, owner of Upsy-Daisy in downtown White Bear Lake, the moniker of DIY Expert fits like the proverbial handcrafted glove. And, truth be told, that glove could also fit nicely on many of the handy and creative folks of her family tree. “My mother, Clare [Jacobsen], comes from a long line of seamstresses,” Rode says. “My grandmothers were always sewing, and my grandfather was very mechanical and fixing things.”
This preternatural inclination grabbed hold of Rode at a young age and was with her when she started crafting necklaces, bracelets and earrings using gold and silver pieces and parts she received from her uncle who was an antique dealer. She created wearable art; her mother created embroidered and sewn items.
Mother and daughter eventually teamed up to refurbish furniture, creating one-of-a-kind pieces, breathing new life into worn, well-used tables, chairs, credenzas and the like. And one project turned into the next. “We just started doing shows and events, and people would ask us where our shop was,” Rode says. “We didn’t have one, so we said, ‘I guess we should open one.’”
Their shop, opened in November 2013, bears the fruits of their creative labors—along with the labors of other artisans who sell their handmade wares. You’ll find Minnesota- and White Bear Lake-themed items, vintage cowboy boots, repurposed furniture, fun signs, witty coasters, embroidered pieces, apparel, pillows and baby items, and all perfectly displayed in the charming 2,400-square-foot space, which Rode describes as “modern farmhouse” meets “industrial rustic.”
Proving the adage that the universe provides, last February Rode received an email from someone from the Minneapolis Home + Garden Show asking if she’d put together a large, DIY area at the show—20 feet by 20 feet, no less. Rust-Oleum was a large sponsor of the event so she painted myriad pieces with their popular chalkboard paint. “When they asked me to do it, it was very last minute,” she says, “but I hustled to get it done; I knew it would be good exposure.”
That great exposure kept on going, and she was asked to participate in a spot on Twin Cities Live, which, of course, she gleefully accepted. She did well; so much so that when she expressed remorse she hadn’t brought items to give away to the Friday live audience, the producers told her, “Not to worry,” they said. “We’d love to have you back.” She’s now their “DIY Expert” and appears every month with a new DIY project. “I wasn’t looking for it,” Rode says. “It just happened.”
So, with all of her experience and expertise, we thought we’d have Rode share some fun holiday DIY projects with our readers.
Rustic Star Tree Topper
Items needed
- 10 sticks that are cut
- to 5” in length
- Hot glue
- Twine
- Chicken wire
- Wire cutters
How to
- Start with 2 sticks and secure them together with hot glue to make the top point of your star.
- Wrap twine around the point.
- Continue making points from 2 sticks (see 2 steps above) until you have 5 points total.
- Lay all the points together to make a star shape.
- Glue all the points together and wrap the joints with twine.
- Place your star on chicken wire.
- Use wire cutters to cut the chicken wire into the shape of your star.
- Hot glue the chicken wire in place to your star.
- Flip over, and you have a beautiful rustic star for your Christmas tree.
Felt Christmas Trees
Items needed
- Felt (about a half yard per tree)
- Sticks, various lengths
- Branches, cut in slices for
- your tree base
- Hot glue gun
- Tree template
- Scissors
- Drill bit
How to
- Find a tree template online and print, or make your own.
- Fold the tree template in half and fold your felt in half. Place the template on the felt so that the folds are lined up.
- Cut your trees—a lot of them!
- Apply hot glue gun along the fold of your felt and then stick the felt tree (folded) to your stick. Repeat this
- step over and over until your stick is full of folded felt trees.
- Use a drill bit to drill a hole (the circumference of your stick) into the wood slice (tree base).
- Apply hot glue into the hole and then stand your tree into the hole.
- Make trees in various heights and display!
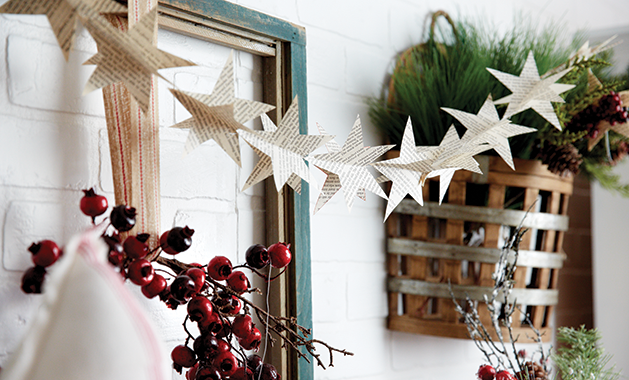
Book-Page Star Garland
Items needed
- Book pages
- Scissors
- Star to trace and pen
- Sewing machine
How to
- Trace and then cut out your star shapes.
- Place 2 stars together.
- Sew two stars together at the same time.
- Keep sewing stars together until you have a garland the length you desire.
- Once you have sewn your strand of stars, fold the stars over the seam.
- You now have a vintage-inspired star garland. Hang from your mantle, tree, etc.
Scrabble Letters - JOY
Items needed
- 3 – 5-1/2” pieces of wood
- 180 grit sandpaper
- 400 grit sandpaper
- 4” vinyl letters (J,O,Y) and ¾” vinyl numbers (8,1,4)
- Country Chic Paint (All-in-One, color “Simplicity”)
- Minwax Early American stain, and soft cloth for application
How to
- Cut your pieces of wood to 5-1/2” by 5-1/2” squares and sand the edges.
- Apply one coat of Minwax Early American stain to the wood using a soft, lint-free cloth.
- Using a Silouette or Cricket, create vinyl letters using arial font.
- If you do not have access to a machine, you could purchase vinyl letters and numbers at your local craft store.
- Apply the vinyl letters/numbers to the blocks.
- Apply a coat of Country Chic Paint “Simplicity” and let them dry.
- Remove all of the vinyl letters and numbers.
- Use a sheet of 180 grit sandpaper and gently distress the edges of the blocks.
- Use a sheet of 400 grit sandpaper and gently sand the entire surface of the blocks until you get a nice, smooth finish.
- Display your scrabble letters and enjoy!


